Make-Something-Monday (Fire Starters)
I thought a great way to get fired up for my first project entry would be to light a fire. This is a project I've completed a few times, and have always had good results. My husband and sons (both Eagle Scouts) tell me that these are their favorite fire starters. They light easily and burn long enough to get your camp fire going. This project is fairly easy, and not too messy as long as you take your time to carefully pour the wax. So, here we go....
Homemade Fire Starters
What you'll need:
1. Place several layers (at least 4) of newspaper out where you'll be working. Cut off the lids of the egg cartons. Recycle lids or use them for another project. Place bottom of carton on newspaper.
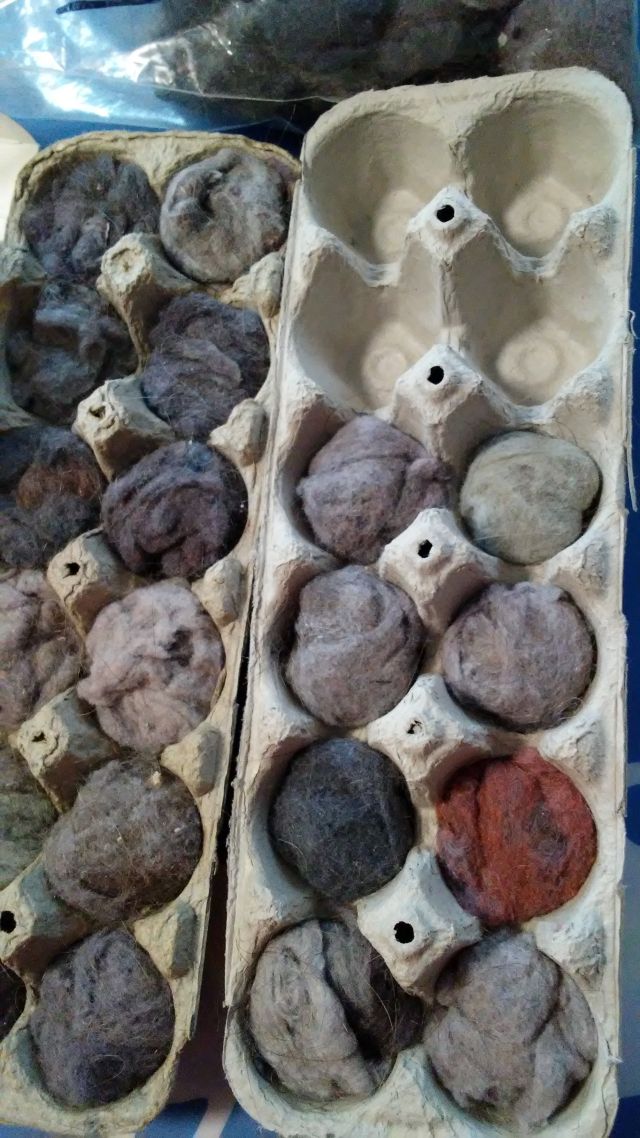
2. Take a hand full of lint and compress, roll, and/or fold it together and fill each egg carton compartment.

3. Remove the label from the soup can. Place a few strips of duct tape around the top, if desired. Cut up your candles/wax/crayons and place it in the can.
4. Place the can into a sauce pan filled with a few inches of water (no more than about half way up the can). Heat on medium until the wax melts completely. *Note: when the can is first placed into the water, it will tend to lean on its side, so be sure to use a pot that's not too wide or the can will tip completely over. As the wax liquefies, the can will sit more upright.

5. Once the wax is melted, use a hot pad or folded cloth to lift the can (carefully) out of the water. Pour the wax evenly over the lint-filled egg carton compartments. The wax should cover the lint. It will seep into the carton a little. Let the wax cool for 20-30 minutes.


6. Once they're cool, you can use scissors to cut the compartments apart. To make this task easier, remember "cut up-cut down" (see photos below). Each compartment is one fire starter. You get 12 starters from a one-dozen count egg carton. Don't cut off the corners of the carton that stick up....that's where you light the starter once it's under your firewood.


Some basic campfire tips:
Homemade Fire Starters
What you'll need:
- Empty pressed paper style egg carton (do NOT use styrofoam or plastic!)
- Dryer lint (I keep a zip-lock plastic bag on my dryer and save it up until needed)
- Wax (I've used old candles, or you can use wax from a craft store, or even a bunch of old crayons with the papers removed. You'll need approximately 1/3 pound total of wax per egg carton. No, using crayons will not cause your fire to burn in colors.)
- Newspaper
- Can (I used an a 20 oz. soup can before tossing it into the recycling bin)
- Duct tape (optional-I cut it lengthwise and placed a few layers around the top of the can to save my fingers from getting singed)
- Sauce pan (I used my regular every day pan, but you can use an old one if you prefer)
- Hot pads or a cloth
1. Place several layers (at least 4) of newspaper out where you'll be working. Cut off the lids of the egg cartons. Recycle lids or use them for another project. Place bottom of carton on newspaper.
2. Take a hand full of lint and compress, roll, and/or fold it together and fill each egg carton compartment.
3. Remove the label from the soup can. Place a few strips of duct tape around the top, if desired. Cut up your candles/wax/crayons and place it in the can.
4. Place the can into a sauce pan filled with a few inches of water (no more than about half way up the can). Heat on medium until the wax melts completely. *Note: when the can is first placed into the water, it will tend to lean on its side, so be sure to use a pot that's not too wide or the can will tip completely over. As the wax liquefies, the can will sit more upright.

5. Once the wax is melted, use a hot pad or folded cloth to lift the can (carefully) out of the water. Pour the wax evenly over the lint-filled egg carton compartments. The wax should cover the lint. It will seep into the carton a little. Let the wax cool for 20-30 minutes.


6. Once they're cool, you can use scissors to cut the compartments apart. To make this task easier, remember "cut up-cut down" (see photos below). Each compartment is one fire starter. You get 12 starters from a one-dozen count egg carton. Don't cut off the corners of the carton that stick up....that's where you light the starter once it's under your firewood.

Cut UP

Cut DOWN

Use the same method to cut each compartment apart
7. There you have it! They may not be pretty, but they work well. You can store your fire starters in a sealed plastic bag. To use, place a fire starter under your arranged small wood when starting a fire. Light a corner of the starter, and proceed like you normally would to get a fire going, adding larger wood as the fire grows.

Some basic campfire tips:
- Never build a fire on dry grass or leaves, on top of roots, beneath low-hanging branches, or where it is not allowed
- Always contain your fire-use a fire ring or create a fire pit with heat-tolerant stones
- Never take things out of a fire once you've tossed them in-what goes in the fire, stays in the fire
- Always have a responsible adult supervising a fire at all times
- Never walk away from a fire, or leave small children alone with a fire
- Always safely put out your fire when you are done
- Never pour flammable liquids, or throw plastics in, a fire
- Always remember to bring supplies for s'mores!
Comments
Post a Comment